

This is a job that I had to match the other tank side. Gas had spilled
on the one side and completely ate through all the graphics. This
job was also done by someone else so I had no idea what colors or
what type of paint was previously used.
The step by step process shows from the beginning to it's current
state.

The step by step process shows from the beginning to it's current
state.


This is after the base was applied. The base is actually a very deep
purple, not black. I laid out the outside of the oval

This is after the oval is completely masked off.

I decided it was best to go with a russet/gold mix to use under the
candy color. This should give the same type of brightness to the
candy once it is applied.

Once the base is dry, I laid a 1/8 line within the oval. If you notice
the 3/4" masking tape in the lower portion. I did this to keep
the tight turn from pulling while I am masking another part.

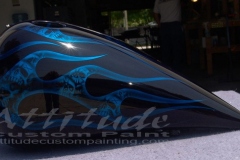
I matched the other flame job from the other tank as close as possible.
I masked up the flame job so that is all that shows.

This is where I take some black, and add just a touch of the russet/gold
mix. This is airbrushed to match the other tank as close as possible

Just the flame mask is removed. The flame job is now complete.

With the same mix as the flame job, I airbrushed the edges around the
oval. Making sure that the blend is very subtle like the other tank.

This view shows all the masking tape removed *within* the oval. If you
notice, the paint is slightly glossier than previous pictures. This
is because I mixed up some basecoat clear (PPG 895) and added some
micro-flake. This will give an exact sparkle as in the other side
tank.

This is just a view from the other end. Though the flames are not perfectly
symmetrical, they are much closer than before (see the top photo).
I also hand laid these without the use of a template.

Here is after the candy is applied. About 4-5 coats was given to achieve
this color. Notice the checkerboard on the tank on the left? This
will done in a later stage.

Another photo of the candy insert. Exact candy match. In the above step,
the left tank seems slightly lighter. This was due to the lighting
and the angle the photo was taken.

This was an earlier photo taken out in the sun showing the checkerboard
that has to be matched.
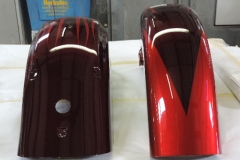
Below is the finished paint job. The tank on the left is the one I
painted.


Tools, equipment, paint and more.
Auto Body Store

Comments