


This How-To is basic step by step to do a beveled blade graphic.
The possibilities are endless on the difficulty you can do with it.
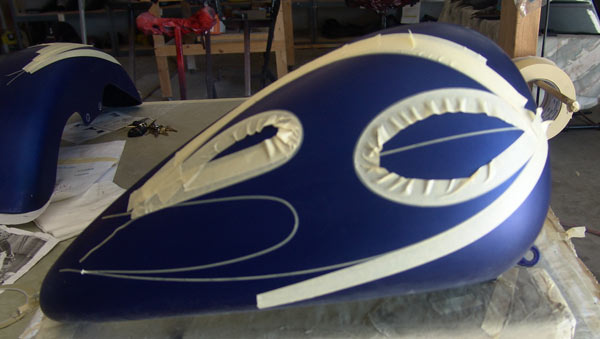
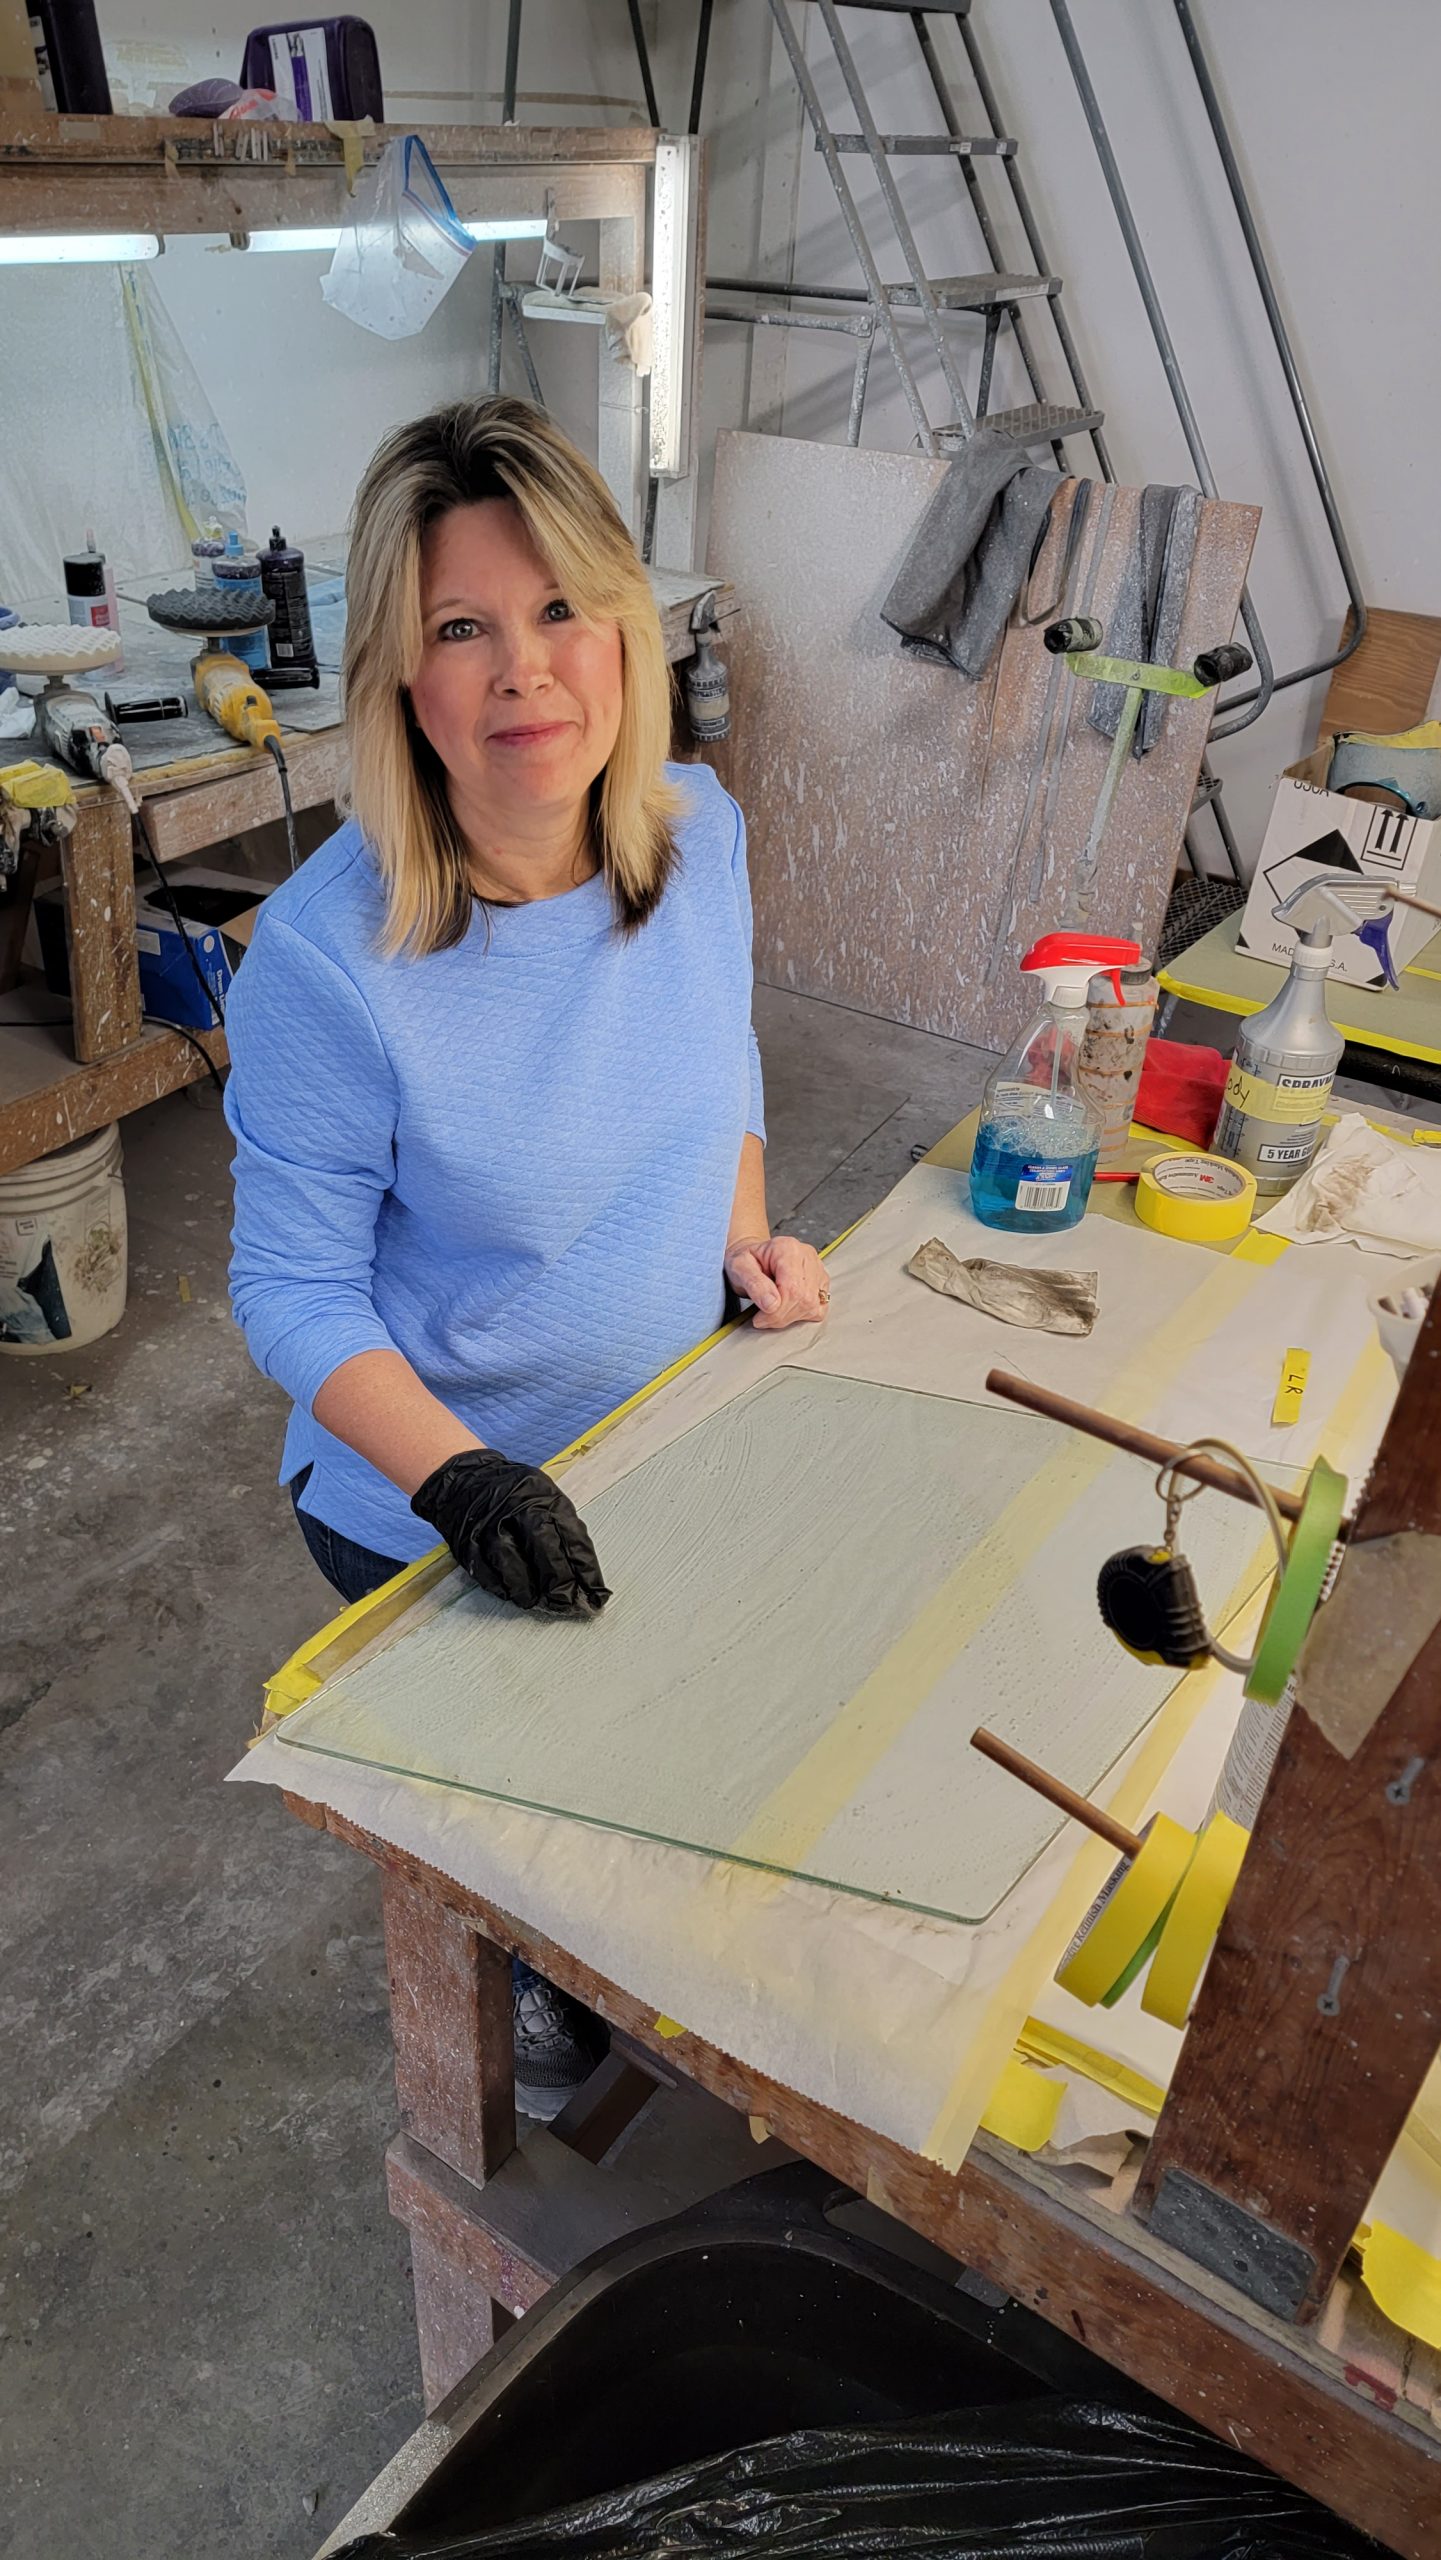
First step is to layout the design. If you end up doing a more difficult design,
you can mask up the part, and then draw and cut the design out
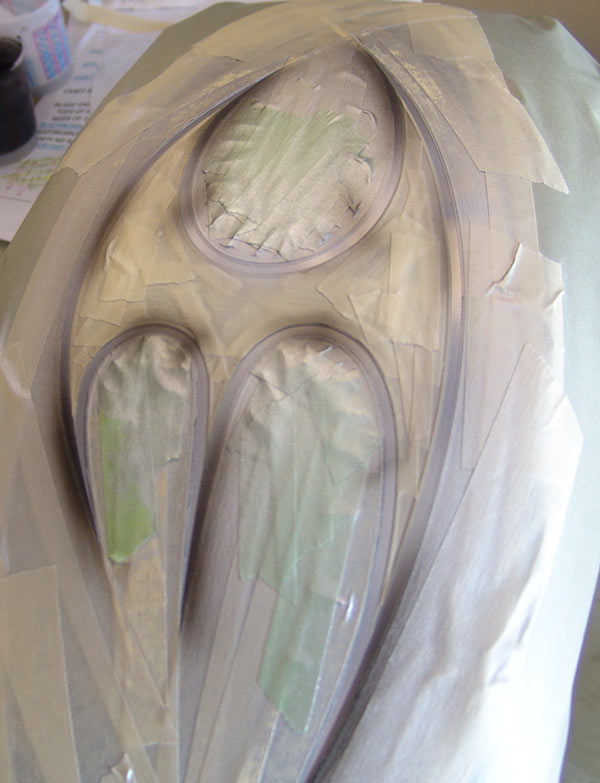
Then you will need to mask up the design. Once you do this, go ahead and spray a couple coats of silver metallic as the base for the blade.
Don't go too heavy on the silver so you don't end up with nasty edge buildup
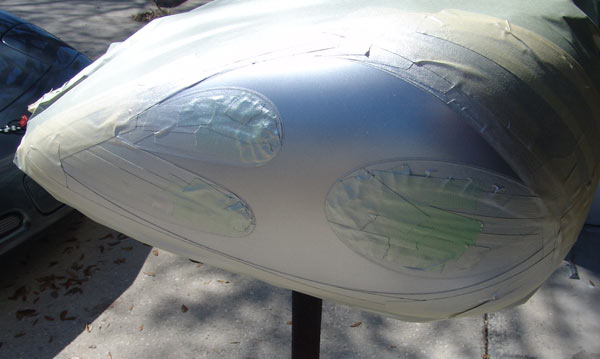
Let the silver base dry. Then we use 1/8" tape to use ONLY as a guide so we have a very consistent 1/8" painted edge around the blade.
Once done, the masked up edge will become the edge with the beveled look.
Immediately on the inside of the 1/8" mask, you want to go around and outline it with 1/16".
Once you do this, you will need to cut the corners so you have nice sharp corners.
Then you can remove the 1/8" tape you used as a guide in the above step.
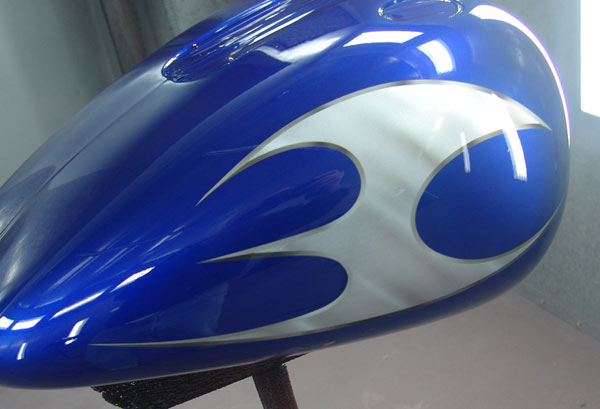
If done correctly, this will give you an exposed 1/8" silver border around the edge of the blade
Then fill in the INSIDE of the tribal with masking tape so all you see is the silver border
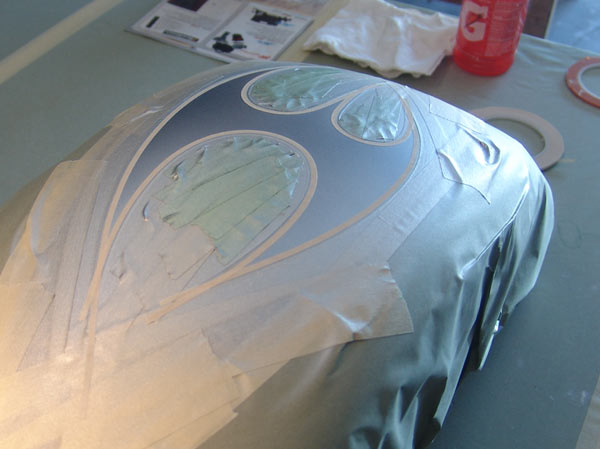
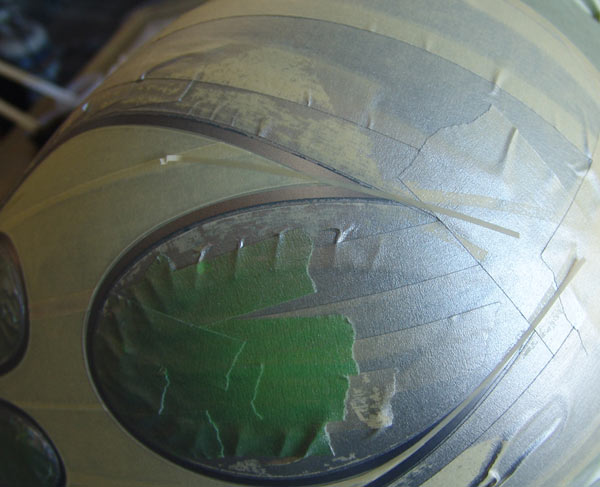
Now we start the shading.
You want to have some over-reduced black and white on hand.
You want to use the black first. You need to mask off the points so they are divided (see below pic). I use a piece of 1/16" and then add a piece of masking tape to mask off the one side of the corner)
One half you will spray with some black shading, the other half will remain the silver.
A tip to use here is try to visualize a light source shining down on the blade.
You want the lower portions or the areas to the left or right to the the 'dark side' (in which you will airbrush the black), and the other will be the light side.
Once you get the corners done with the black, you can add some shading around various areas around the edge so it resembles shading.
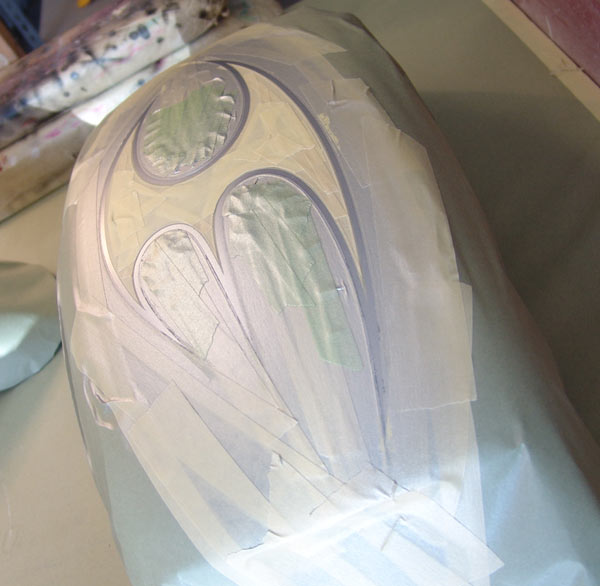
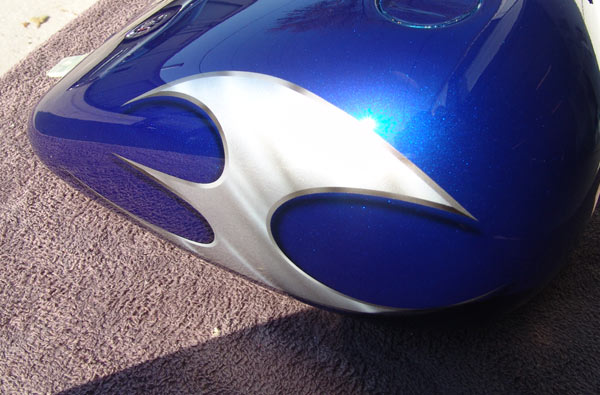
After you get the black airbrushed, use the white to go around and airbrush some various areas.
REMEMBER, less is better when dealing with white. You want this to be very light as too much will kill the look and effect you want.
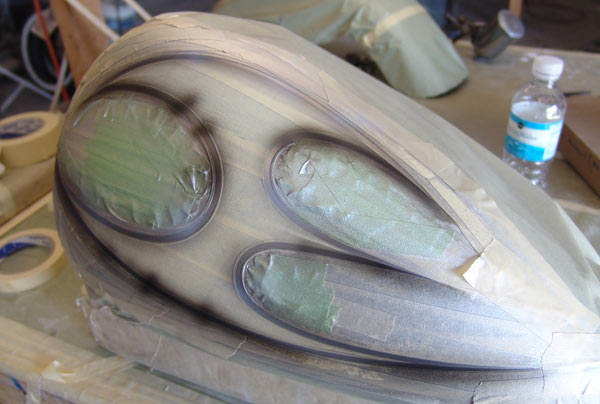
This pic also shows some of the various shading I did with the over-reduced black and white
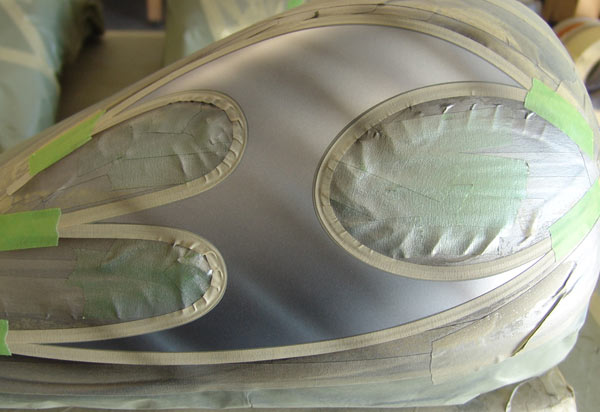
Once you get the shading done on the edges and corners, you need to carefully mask up the edge you just airbrushed with 1/16" tape
Once you do this, add some on the main portion of the blade. This will give the blade the effect as though something is reflecting off of it.
Again, you must go very light with the white. If done correctly, some angles the white disappears and others it will overpower the silver and the shading. Very nice effect
Once done, you can go ahead and put a couple coats of clear over. Then you can resand and add drop shadows, then reclear if you would like to really bring out the blade
Tools, equipment, paint and more.
Auto Body Store


More
Comments